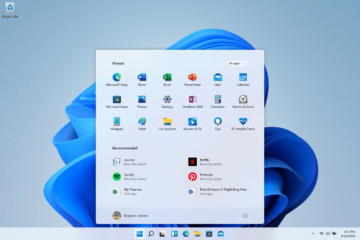
For many businesses, it’s standard operating procedure for employees to leave their workstation computers on when they leave the office. Typically, at some point later in the evening, those workstation computers will slip into sleep or hibernation mode, which reduces power consumption—at least a little. But what if a business wants to reduce power consumption even more?
In Microsoft Windows 10, it is possible to set up a scheduled shutdown of a PC for a specific time. Theoretically, a computer that is completely shut down will consume less power and save a business considerable amounts of money, as well as reduce its carbon footprint. Arranging an after-hours shut down is accomplished with the aide of the Windows 10 Task Scheduler.
This how-to tutorial shows you how to use the Windows Task Scheduler to start a shut-down sequence for a Windows 10 computer at a specific time.
SEE: Research: Autonomous transportation in the enterprise: Mixed impact anticipated (TechRepublic Premium)
Schedule a Windows 10 shut down for a specific date and time
Some version of the Task Scheduler application has been part of the Windows Administrative Tool Kit from the operating system’s first release. The Windows 10 version can be accessed by typing “task scheduler” into the desktop search box and then selecting the appropriate result. As you can see in Figure A, the Task Scheduler can perform many tasks and can be a bit intimidating at first glance.
Figure A

Our scheduled shut down is classified as a basic task, so click the “Create Basic Task” item in the right-hand window to start the creation process, shown in Figure B.
Figure B

Give your task a name and a description and then click the Next button to reach the Trigger screen shown in Figure C.
Figure C

There are several choices shown. You could run this shut-down process every day, once a week, or perhaps once a month. You can also ask the Task Scheduler to wait for a specific event. For our example, we will choose daily. Click Next when you have made your choice. If you chose daily, you will then be asked to specify a starting date and a time for execution, as shown in Figure D.
Figure D

After making your choices, click the Next button to reach the Action screen shown in Figure E. There are three choices on this screen, but the one we will use is Start a Program.
Figure E

Click Next to move to the screen shown in Figure F. This is where the main function of our task will be entered.
Figure F

Enter “shutdown” into the script box and enter ” -s -f -t 60″ into the Add Arguments box. The arguments are part of the standard settings for the shutdown.exe program. The -s tells Windows to shut down, or you could use -r to have the PC restart instead. The -f forces running applications to close as part of the shut down process and the -t 60 adds a 1-minute countdown. If you want to make it an immediate shut down, change that argument to -t 0.
Click Next to reach the Finish screen shown in Figure G, where you will be presented with a summary of your task and be given the opportunity to have the properties dialog open for this task after you click the Finish button.
Figure G

When you are satisfied with the setting for your task, click the Finish button to save it and then close out the Task Scheduler. For our example, starting 11/12/2019 at 1:00am, our Windows 10 computer will close any running applications and shut down after a 1-minute countdown.
[“source=techrepublic”]


