One of the key features of Android is that it is open source. The source code for the full operating system, including the kernel, UI, libraries and key apps, is available for free. This means that anyone (with the right technical skills) can build Android from source and flash it onto a compatible device. This flexibility has allowed various groups, some commercial and some hobbyist, to develop alternative distributions of Android. These are commonly referred to as “custom ROMs” however a better name would be “custom firmware.”
Since all the necessary building blocks are available, maybe you have wondered how hard it is to build your own custom ROM, your own personalized version of Android! It is indeed possible, read on to find out more.
Contents
Warning
Before we dive into the murky world of building custom versions of Android, we need to pause and assess the enormity of the task ahead, while keeping our expectations in check. If you have absolutely no coding experience, zero experience with using the command line (on Linux or macOS), or no idea what is a “Makefile” then this isn’t for you.
Android is a complete operating system. It is complex and contains many different subsystems. Creating an operating system as complex and useful as Android didn’t happen over night. This means that any customization that you wish to perform is going to have to start small. To create an alternative Android distribution that is radically different will take many, many hours of hard work and dedication.
Having said that. If you are familiar with writing code, if you do know a bit about Makefiles and compilers then making your own version of Android can be a rewarding experience!
Prerequisites

Theoretically it would be possible to build a custom Android firmware for any computing device capable of running a modern operating system. However to make life easy we will limit ourselves to building Android to devices which have support “out of the box”, namely Nexus devices. For my demo build I used a Nexus 5X.
To build Android you are going to need access to (and familiarity with) and Linux machine or a Mac. In both cases you will be using the terminal a lot and you need to be confident with shell commands. I did my first build using a Linux virtual machine, however it wouldn’t recognize the Nexus 5X when in bootloader mode, so I was unable to flash the new firmware on the device. So then I switched to a Mac and it worked without too many problems.
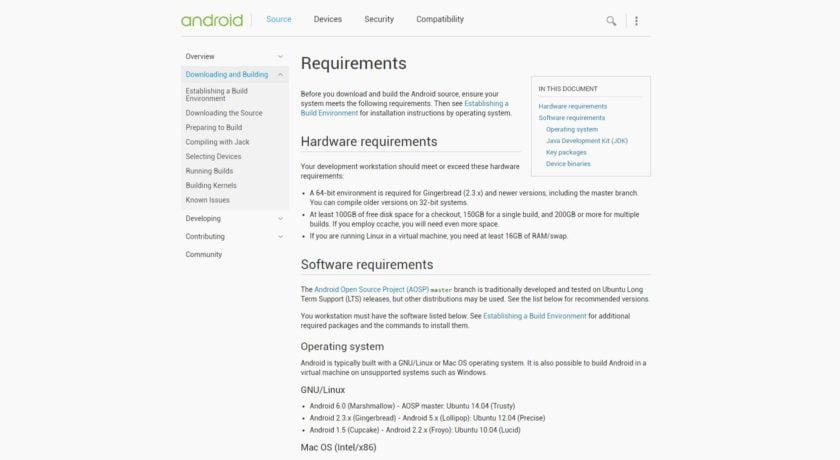
You will need 130GB of disk space and probably around 8GB of RAM. I tried building Android with just 4GB of RAM and I ran into lots of problems. I also ran into similar problems with 8GB of RAM, however using some tricks (see later) I was able to create a successful build.
Learn patience. Building Android isn’t quick. To synchronize the source repository with my local machine took almost 24 hours! Also, a full clean build will take several hours to complete. Even after making a minor change you might need to wait 10 to 20 minutes for a build. It all depends on your hardware, however don’t expect to have your new version of Android up and running in just a few moments.
The Android Open Source Project version of Android does not include any Google services. So things like Google Play, YouTube, Gmail and Chrome will be missing. There are ways to flash those “gapps” onto your own custom firmware, but I will leave you to find out how to do that. Hint: Search for “install gapps”.
Where to start
The basic process is this. Download and build Android from the Android Open Source Project, then modify the source code to get your own custom version. Simple!
Google provides some excellent documentation about building AOSP. You need to read it and then re-read it and then read it again. Don’t jump any steps and don’t assume you know what it will say next and skim over parts.
I won’t repeat verbatim what is in the build instructions here, however the general steps are:
- Set up a build environment – including installing the right development tools, the Java Development Kit, and getting all the paths and directories right.
- Grab the source – this is done using the “Repo” tool and git.
- Obtain proprietary binaries – some of the drivers are only released in binary form.
- Choose a target – using the “lunch” tool.
- Start the build – using “make” and Jack.
- Flash the build onto your device – using adb and fastboot.
Tips and tricks for the build process
That all sounds easy, but there are a few gotchas along the way. Here are some notes I made during the process that you might find useful:
Set up a build environment – Ubuntu 14.04 is the recommended build environment for Linux users and OS X 10.11 for Mac users. You need to install OpenJDK 8 on Linux and Oracles JDK 8 on OS X. On OS X you also need Macports installed along with Xcode an the Xcode command line tools. I used OS X 10.12 which caused a little problem with the function syscalls being deprecated in the 10.12 OS X SDK. The work around is here: http://palanceli.com/2016/09/25/2016/0925AOSPOnMac/
Grab the source – This is an easy step, however it takes a long time. For me it took over 24 hours. Such a large download only happens once, further syncing with the main source tree will be incremental.
Obtain proprietary binaries – The binary drivers should be unpacked in your working directory.

Choose a target – For the Nexus 5X use aosp_bullhead-user
Start the build – You start the build using make. GNU make can handle parallel tasks with a -jN argument, and it’s common to use a number of tasks N that’s between 1 and 2 times the number of hardware threads on the computer being used for the build. However, if you find your machine struggles during the build process then try something like “make -j2”.
If you get build errors which seem related to memory, especially about the Jack server and memory then do these two things:
- export ANDROID_JACK_VM_ARGS=”-Xmx4g -Dfile.encoding=UTF-8 -XX:+TieredCompilation”
- change the jack.server.max-service in $HOME/.jack-server/config.properties to 1
If you change any of the Jack server configuration stuff (including setting or altering the ANDROID_JACK_VM_ARGS variable) then you need to kill the Jack server and run the make again. Use ./prebuilts/sdk/tools/jack-admin kill-server to stop the Jack server.
If you get any communications errors related to the Jack server then just start the build again, that normally fixes it.
Flash the build onto your device – You will find adb and fastboot in ./out/host/darwin-x86/bin/ or ./out/host/darwin-x86/bin/ for OS X or Linux respectively.
Flash it

Once you have a successful build and you have flashed it onto your device using “fastboot flashall -w” then reboot your device. What you will see is a vanilla version of AOSP. There are no Google services, no Play Store and only a few core apps. This is the bare bones of Android.
However, congratulations are in order. You have managed to build Android from its source code and flash it on to a device. That is no mean feat.

Customization
Now that you have Android up and running, you can start to customize it and make your own specialist ROM. This is actually where things get hard. You are about to tinker with a guts of the Android operating system and the problem is that Android is huge. My working directory is like 120+GB of data. That is the source code, the graphics, the compiled binaries, the tools, everything. That is a lot of stuff.
So, start simple. Here are two simple customizations that will get you going, start on the path to being an Android firmware hacker!
Customize the messaging app
A relatively easy customization is to change one of the pre-built apps. If you were to develop a full alternative Android distribution then modifying or replacing some of the core apps would be a given. In this case we are just going to tweak it, however the principles remain the same for more complex changes and revisions.
The core apps are found in the directory ./packages/apps/ and we are interested in the Messaging app in ./packages/apps/Messaging/. Drill down throughsrc/com/android/messaging/ and edit BugleApplication.java. You can edit it with your favorite GUI editor or if you want to stay on the command line then use vi or nano.
BugleApplication.java is the entry point for the Messaging app. To keep things simple what we are going to do is add a Toast that will be displayed when the app is first started. Near the top of the file underneath the long list of import statements add this line:
import android.widget.Toast;
Now look for the onCreate() function. Towards the end of the function, before the final call toTrace.endSection(); add the following two lines:
Toast myToast = Toast.makeText(getApplicationContext(), "Welcome!", Toast.LENGTH_LONG);
myToast.show();
Save the file and start another build using the make command. Once the build has finished, flash it onto your device and reboot. Start the Messaging app and look for the “Welcome!” toast. Obviously this is a simple modification, however the potential is there to modify any of the default apps, in whatever way you please.

More customization
Any self-respecting custom Android distribution must include some information about the ROM itself. To do this we can alter the built-in Settings app and add some information to the About Phone section. To do this, edit the file device_info_settings.xmlfrom ./packages/apps/Settings/res/xml/ and add the following two sections at the bottom of the file before final </PreferenceScreen> tag:
<!-- ROM name -->
<Preference android:key="rom_name"
android:enabled="false"
android:shouldDisableView="false"
android:title="ROM name"
android:summary="Whizz Bang Pop ROM"/>

<!-- ROM build version -->
<Preference android:key="rom_number"
android:enabled="false"
android:shouldDisableView="false"
android:title="ROM build number"
android:summary="7.0.1"/>
Save the file and then rebuild and re-flash the firmware on your device. Once you reboot go to Settings->About Phone and scroll to the bottom:

The above alteration is a bit of hack as really the strings should be defined in strings.xml for English and for others languages. If you plan to do any serious AOSP development you need to do things right!
Wrap-up
The two modifications I have made are very basic and there is loads more that could be done including pre-installing other apps, adding ringtones & wallpapers, and tweaking the kernel. However I hope this has given you a taste of what is possible or at least given you an idea about how to build AOSP and tinker with the innards of Android!
[Source:-Android authority]


